

Choosing the Right Paper Weight for Embossing
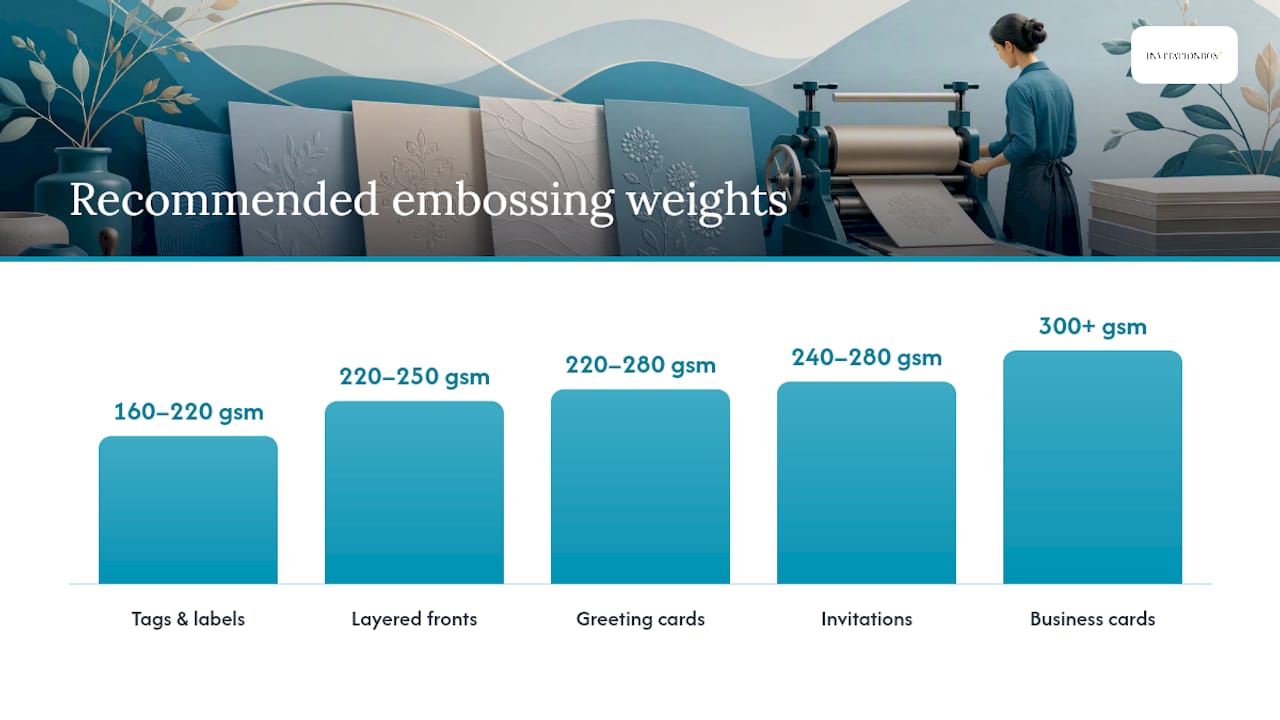
For most dry embossing projects, start with cardstock between 220 gsm and 280 gsm (roughly 80–110 lb cover). That range holds a crisp raised impression without tearing, and it’s where most greeting cards, invitations, and layered card fronts land naturally. Lighter weights can work with a few technique tweaks, and deep or commercial embossing often calls for something heavier. Here’s a quick breakdown to get you started:
- Greeting cards and card fronts: 220–280 gsm (80–110 lb cover)
- Invitations: 240–280 gsm (90–110 lb cover)
- Tags and labels: 160–220 gsm (65–80 lb cover)
- Business cards: 300 gsm and above (110 lb cover+), often much heavier for commercial work
- Heat embossing: 160–280 gsm (65–110 lb cover); smooth surface matters more than weight here
- Deep or letterpress embossing: 280 gsm and above (110 lb cover+)
The single rule to remember: Avoid thin text-weight paper (under 90 gsm) and laid or linen-textured stocks for fine-detail embossing. Both fight the impression and blur the edges.
Key Takeaways
The best paper weight for embossing is 220–280 gsm (80–110 lb cover) for most greeting cards and invitations, with heavier stock required for business cards and deep embossing.
| Point | Details |
|---|---|
| Core weight range | 220–280 gsm (80–110 lb cover) works for most greeting cards, invitations, and card fronts. |
| Business cards need more | Deep embossing on business cards often calls for 300 gsm and above; commercial work goes heavier still. |
| Avoid these surfaces | Laid, linen, and coated stocks blur fine detail; smooth uncoated cover stock gives the cleanest impressions. |
| Always run the one-minute test | Cut a small square, emboss it, inspect front and back, and flex-test before committing to a full run. |
| Invitationbox option | Invitationbox offers ready-to-use custom embossers and pre-designed cards for crafters who want a finished result fast. |
Table of Contents
- Why does paper weight change your embossing results?
- What weight works best for each type of project?
- Which paper surfaces and textures give the best embossing results?
- How to get cleaner embosses and prevent tearing
- How to test any paper before you commit to a full run
- Understanding weight labels: lb, cover vs. text, and gsm
- A crafter’s honest take on getting embossing right
- Ready-made embossers and custom cards from Invitationbox
- Sources
Why does paper weight change your embossing results?
Thicker stock holds its three-dimensional shape after the die or folder presses into it. Lighter paper tends to stretch rather than deform cleanly, which can cause tearing along fine lines or a shallow impression that loses detail on the reverse deboss.
Fiber structure matters just as much as raw weight. Uncoated papers with longer fibers, like cotton or rag stocks, compress beautifully and spring back just enough to hold the raised shape. Coated or heavily sized papers resist that compression, so the impression can look shallow or pop back flat within hours. Internal sizing, the treatment mills use to control ink absorption, also affects how the sheet deforms under pressure.
Pro Tip: If your cardstock is cracking along embossed edges, the sheet is too dry or too stiff for the pressure you’re applying. A very light water spritz on the back of the sheet, just enough to add slight moisture without warping, lets the fibers relax and compress without splitting.
A good emboss is really about fiber movement. Weight tells you how much material is there; surface and sizing tell you whether those fibers will move the way you need them to.
What weight works best for each type of project?
Cardstock designed for embossing commonly falls between 220 gsm and 300 gsm, with heavier weights reserved for structural work like boxes or thick card blanks. Here’s how that plays out across common projects:
- Greeting cards: 220–280 gsm gives you a deep, clean impression with a visible reverse deboss. Go lighter and the card feels flimsy; go heavier and it may resist the folder.
- Layered card fronts: Stay at 220–250 gsm so the layers don’t add too much bulk when adhered together.
- Invitations: 240–280 gsm is the sweet spot. It mails cleanly within standard envelope weight limits and still takes a sharp impression. Check your envelope’s inner dimensions before going above 280 gsm, since thicker stock can make the flap gap.
- Tags and labels: 160–220 gsm works well here. Tags don’t need the same structural rigidity, and lighter stock punches and strings more easily.
- Business cards: This is where most crafters underestimate weight. Forum discussions among commercial embossers reference cover weights as heavy as 220 lb cover for deep business-card embossing. Even for lighter hand-pressed work, 300 gsm is a reasonable floor. Keep in mind that very thick business cards add wallet bulk, so weigh that tradeoff against the impression depth you want.
- Heat embossing: Weight is less critical here than surface smoothness. A 160–280 gsm smooth, uncoated stock gives embossing powder something to grip. Coated or glossy sheets cause the powder to slide off before it melts.
- Deep or letterpress embossing: Go 280 gsm and above. The pressure required for deep impressions will buckle or tear lighter stock, especially across larger design areas.
Lighter cover weights like 65–80 lb cover can produce crisp results when you add a backing board or adjust your folder sandwich, so don’t rule them out entirely for tags or delicate layered pieces.
Which paper surfaces and textures give the best embossing results?
Smooth, uncoated cover stock is the safest starting point for crisp, detailed impressions. The surface offers no interference, the fibers compress evenly, and fine lines in a die or folder come through cleanly on both sides of the sheet.
Here’s a quick guide to common paper types:
- Coated or glossy stocks: The coating resists compression and can cause the impression to look shallow. Avoid for dry embossing; acceptable for heat embossing if the surface is not too slick.
- Pearl or pearlized stocks: These can be used intentionally for a soft, luminous effect, but fine-line detail suffers. Great for wedding invitations where a gentle shimmer matters more than sharp edges.
- Kraft: Uncoated kraft takes a decent impression, though the natural texture adds a rustic softness to edges. Works well for tags and earthy-themed projects.
- Cotton or rag stocks: Among the best choices for embossing. Long fibers compress deeply and hold the raised shape with excellent edge definition. Often used for high-end stationery and wedding invitation embossing.
- Vellum: Thin vellum (32–40 lb) can produce a frosty, crisp impression, while heavier vellum (67 lb) embosses deeply but may fray or tear along fine lines. Test a scrap before committing.
- Laid or linen textures: The surface grid fights fine-line detail. Use these only when you want a deliberately soft, textured impression, not a sharp one.
Pro Tip: Pearlized and linen stocks are not mistakes to avoid entirely. They’re tools for a specific aesthetic. If you want a rustic or softly elegant look, lean into the texture. Just don’t expect razor-sharp detail.
How to get cleaner embosses and prevent tearing
Small setup changes fix most embossing problems before they start. The impression quality you get is rarely about the die or folder alone.
- Use a backing board. A piece of cardstock or an index card behind your project sheet adds support and helps the impression register evenly across the whole design.
- Add a shim. A thin piece of cardstock inside your folder sandwich increases pressure on lighter stocks and helps push the impression deeper without extra force.
- Spritz lightly for dry or stiff card. A barely-damp mist on the back of the sheet, left for 30 seconds before embossing, reduces cracking on stiffer stocks. Don’t soak it.
- Rotate the design orientation. If one side of an impression is shallower than the other, rotating the sheet 90 degrees and running it again often levels the pressure.
- Try wax paper for smooth glide. Rubbing wax paper over your embossing folder before use reduces drag and helps the sheet move through cleanly.
- Check your machine’s cutting plates. Warped or worn plates create uneven pressure, which shows up as inconsistent impression depth across a design.
Pro Tip: A slightly cracked edge along a bold embossed line isn’t always a flaw. On kraft or textured stock, it can read as intentional and handmade. Save those “imperfect” test pieces, because sometimes they’re the most charming ones in the batch.
How to test any paper before you commit to a full run
One quick test tells you whether a sheet will emboss cleanly, and it takes under a minute.
- Cut a 3-inch square from your chosen stock.
- Run it through your folder or press using the same sandwich setup you plan to use for the full project.
- Inspect the front. Look for sharp, even edges on the raised impression. Fuzzy or shallow lines mean the stock is too heavy, too coated, or the pressure is too low.
- Flip it over. The reverse deboss should be clearly visible. If it’s barely there, add a shim or increase pressure.
- Flex the embossed area gently. If the raised section cracks or whitens along the edges, the stock is too dry or too stiff. Try a light spritz and re-test.
- Check for tearing. Any torn fibers along fine lines mean the stock is too light for the design’s detail level. Step up in weight or simplify the design.
Pass signs: Clean raised edges, visible reverse deboss, no tearing, no cracking. Adjust if: Impression is shallow (add shim), edges crack (spritz or step up in weight), design tears (heavier stock needed).
Understanding weight labels: lb, cover vs. text, and gsm
Weight labels on paper packaging can feel confusing, but the logic is straightforward once you know the system.
- “80 lb cover” means the paper was weighed as part of a standard cover-weight parent sheet. Cover stock is thicker and stiffer than text stock at the same number.
- Cover vs. text weight: An 80 lb cover sheet is much heavier than 80 lb text. They use different parent sheet sizes for the calculation, so the numbers don’t compare directly. For embossing, always look for cover weight designations.
- GSM (grams per square meter): This is the most consistent measure across brands and countries. It doesn’t depend on parent sheet size, so 250 gsm means the same thing everywhere.
-
Quick equivalents for embossing ranges:
- 65 lb cover ≈ 175 gsm
- 80 lb cover ≈ 216 gsm
- 100 lb cover ≈ 270 gsm
- 110 lb cover ≈ 298 gsm
The one rule to remember when shopping: If a label says “text” or “bond,” it’s almost certainly too light for dry embossing. Look for “cover,” “cardstock,” or a gsm value of 160 or above.
A crafter’s honest take on getting embossing right
Embossing is one of those techniques where the paper choice does more of the work than the tool does. After working through the guidance and practical experience behind this article, the most overlooked piece of advice is this: test on a scrap first, every single time, even when you’ve used that stock before. Humidity, storage conditions, and even the season can change how a sheet behaves under pressure.
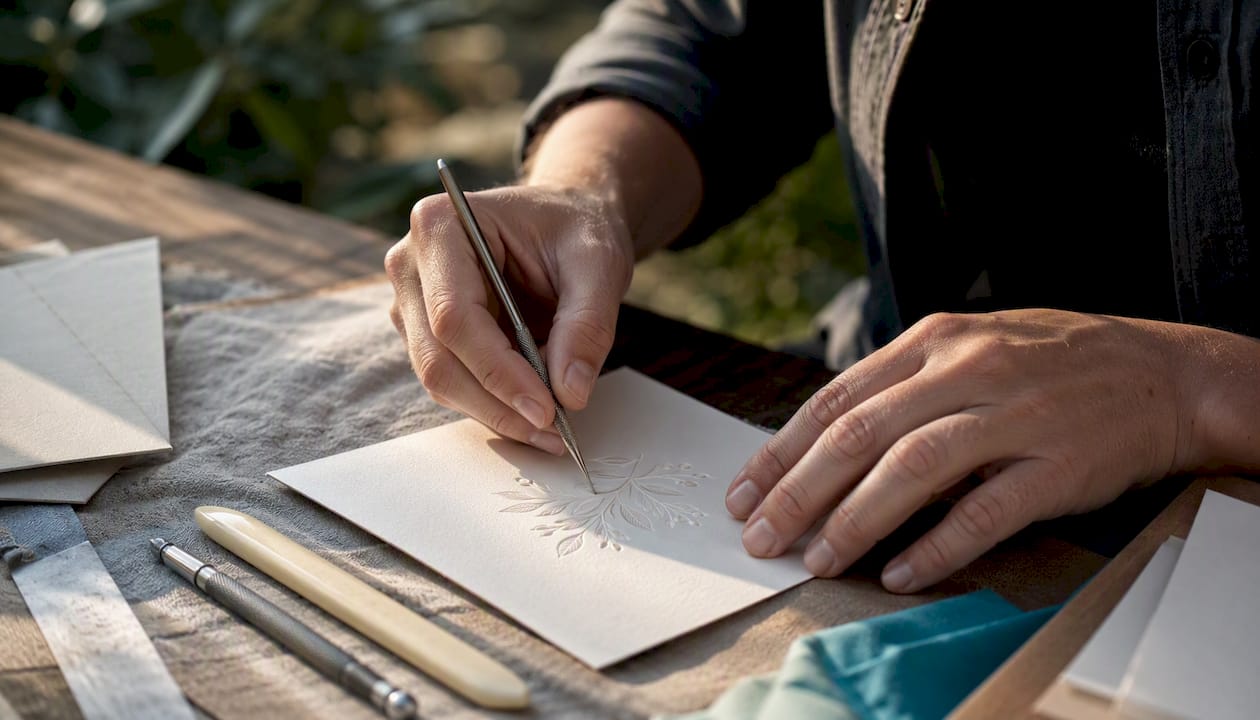
The weight ranges here are starting points, not guarantees. A 250 gsm sheet from one mill can behave very differently from a 250 gsm sheet from another, depending on fiber content and sizing. That’s not a flaw in the system; it’s just the nature of paper. The one-minute test in this guide exists precisely because no chart can replace a quick physical check.
If you’d rather skip the paper-sourcing puzzle and go straight to beautiful embossed results, Invitationbox’s embossing tools for stationery are worth a look. The products are designed with real stationery workflows in mind, which means less guesswork on your end.
Ready-made embossers and custom cards from Invitationbox
When you want a polished embossed result without sourcing paper and testing weights from scratch, Invitationbox offers a range of custom embossers and pre-designed cards built for exactly that.
The Woodcut Stamper or Embosser and the Extra Ornamental Stamper or Embosser are popular choices for crafters who want a motif embosser ready to use on their own cardstock. For themed projects, the Paw Print Stamper or Embosser, Vintage Seahorse Stamper or Embosser, Horseshoe Stamper or Embosser, and Jolly Rogerette Stamper or Embosser each bring a distinct personality to cards, tags, and stationery. If you’re working on event invitations or holiday cards and want a fully finished product, the Fun Holiday Confetti Photo Card and Believe Photo Card are ready to personalize and send.
Three use cases where ordering from Invitationbox saves real time: small-run business cards where sourcing heavy cover stock is impractical, event invitations where consistent embossing across a batch matters, and holiday cards where you want a professional finish without a full craft setup. Browse the full collection at Invitationbox.com and find the embosser that fits your next project.
Sources
These sources informed the weight ranges, surface guidance, and practical tips throughout this guide. Each one is worth bookmarking if you want to go deeper on a specific topic.
- Which paper or cardstock is best for my project? | Crafters Companion UK
- Which paper or cardstock is best for my project? | Crafter’s Companion US
- How to Emboss Cardstock! - The Graphics Fairy
- Emboss Paper Like A Boss | Quick And Easy Guide
- embossing paper weight … (forum thread) | Briarpress
Recommended
- Best Book Embossers for 2026: Top Picks Reviewed – InvitationBox.com
- Enhancing Your Personal Stationery with an Embosser Stamp: A Touch of – InvitationBox.com
- 5 Creative Projects You Can Do at Home with Embossing Tools – InvitationBox.com
- How Embossing Tools Can Elevate Your Stationery Game – InvitationBox.com