

Prevent Guest Confusion: Inner and Outer Envelopes for Wedding Hosts
Inner and outer envelopes are a paired mailing system: the outer envelope is the sealed vessel that travels through the mail, and the inner envelope is an unsealed, name-only insert that tells guests exactly who is invited. Formal weddings, black-tie events, and any invitation suite with delicate liners or layered cards call for both, as these black-tie wedding guest occasions warrant a polished presentation. Casual parties and showers do as well with a single, clearly addressed envelope.
TL;DR:
- Using a double-envelope system clarifies exactly who is invited and prevents guests from assuming children or plus-ones are included.
- Outer envelopes should be fully formal with complete addresses, while inner envelopes contain only guest names, matched carefully to the invitation list.
- Envelope size matters greatly; pair a 5x7 invitation with a roughly 5.25 by 7.25-inch outer envelope and a slightly smaller inner envelope for smooth insertion.
- Assembly must follow a specific order — stacking enclosures from smallest to largest and inserting the inner envelope with names facing out — to ensure proper presentation.
- Weighing assembled envelopes and choosing materials carefully prevent postage issues, especially when adding liners or specialty finishes.
Table of Contents
- What Do Inner and Outer Envelopes Actually Do?
- How Should You Address Outer vs Inner Envelopes?
- What Size Envelopes Fit Your Invitation Suite?
- How Do You Stuff a Double-Envelope Invitation?
- Which Materials and Finishes Work Best for Mailing?
- Why Choose InvitationBox for Envelopes and Finishing Touches
- The Etiquette Rule Most Hosts Get Backwards
- How InvitationBox Makes Envelope Addressing Simple
- Sources
What Do Inner and Outer Envelopes Actually Do?
Think of the outer envelope as the workhorse and the inner envelope as the host’s personal touch. The outer envelope carries the full mailing address, your return address, and postage, and it’s built sturdy enough to survive a mail truck. The inner envelope does something the outer one can’t: it names precisely who’s invited, whether that’s “Mr. and Mrs. Alan Brooks,” “The Brooks Family,” or “Mr. Alan Brooks and Guest.”
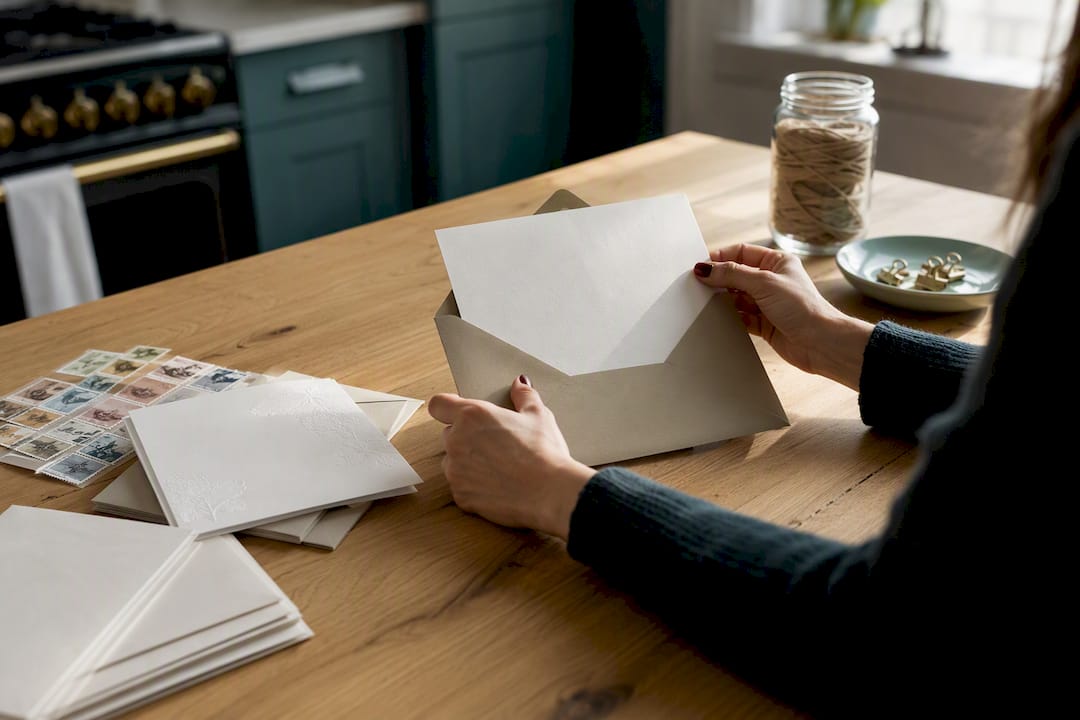
That distinction solves a real problem. Wedding hosts constantly worry about whether guests will assume kids or plus-ones are included. Etiquette sources point out that naming invitees explicitly on the inner envelope removes that guesswork entirely.
A few anatomy notes matter when you’re shopping:
- Outer envelopes typically come with a commercial flap (straight, pointed) or a Euro flap (rounded, deeper), and both work fine for formal mail.
- Inner envelopes are traditionally left ungummed and unsealed as a courtesy to the person opening it.
- Colored or patterned liners inside the outer envelope create a small reveal moment when the flap opens, showing off the inner envelope’s edge or a contrasting paper.
How Should You Address Outer vs Inner Envelopes?
The outer envelope is formal and complete. It carries titles, full names, and the full mailing address, written the way you’d address any important piece of mail: “Mr. and Mrs. James Whitfield, 214 Birchwood Lane, Denver, CO 80203.” Your return address goes on the back flap or top left corner of the front.
The inner envelope is shorter and warmer. It skips street addresses entirely and lists only the names of who’s invited, formatted to match your relationship with the guest.
Follow this sequence to keep both envelopes consistent:
- Confirm each guest’s legal name and preferred title (or Mx., if that fits better than Mr./Mrs.).
- Write the outer envelope in full formal style, including titles and the complete address.
- Write the inner envelope with first and last names only, or “Mr. and Mrs.” plus surname for married couples.
- For families, add “and Family” or list children by first name under the parents’ names.
- For unmarried couples or different surnames, list both full names on separate lines, generally alphabetically.
- Double-check that the inner envelope’s names match who you actually intend to invite. This step catches more mistakes than any other in the process.
Modern etiquette accepts first names, Mx., and other flexible formats as long as you verify each guest’s preference beforehand.
Pro Tip: If you’re skipping the inner envelope to save money, write the invited names directly on the outer envelope or slip in a small note clarifying who’s included. Without an inner envelope, that’s the only place guests will see it spelled out.
What Size Envelopes Fit Your Invitation Suite?
Card size drives envelope size, and getting this wrong is the single most common ordering mistake. A 5x7 invitation needs an A7 outer envelope, which measures roughly 5.25 by 7.25 inches, giving you a small margin for the card to slide in without jamming. A 4.5x6.25 card typically pairs with an A6 outer envelope, and oversized invitations often move up to A9.
Inner envelopes run slightly smaller than their outer counterparts. That’s intentional. An A7 suite usually pairs with an inner envelope sized about a quarter inch narrower on each side, so it slips into the outer envelope cleanly without buckling the enclosures.
A few practical guidelines when you’re ordering:
- Allow at least a quarter inch of clearance between your stacked enclosures and the inner envelope’s edges.
- Order a sample set before committing to hundreds of envelopes. Seeing the paper weight and fit in hand catches problems no product photo will show you.
- Order some extra envelopes beyond your guest count to cover addressing mistakes and keepsakes.
- Heavier card stock and thicker liners can push your suite over standard postage weight, so weigh a fully assembled sample before buying stamps in bulk.
How Do You Stuff a Double-Envelope Invitation?
Assembly order matters more than most hosts expect, because it determines what your guest sees first when they open the mail. Here’s the sequence that etiquette guides consistently recommend:
- Stack your enclosures from smallest to largest, with reply cards and detail cards on top of the main invitation.
- Place the invitation printed side up, so it reads correctly the moment the inner envelope is opened.
- Slide the stack into the inner envelope, leaving it unsealed.
- Insert the inner envelope into the outer envelope with the guest names facing the back flap, so the names are the first thing visible when the recipient opens it.
- Seal the outer envelope only, using a glue stick or a moistened gum flap rather than tape.
If you’re assembling dozens of these, set up an assembly line: one station for stacking enclosures, one for stuffing inner envelopes, one for the final outer insertion. Having a second person double-check names against your guest list before sealing catches the two most common errors: mismatched names and enclosures inserted upside down.
Pro Tip: Keep a printed checklist next to your workspace with every guest name from your list. Cross each one off as you seal their envelope so nobody gets missed or duplicated.
Which Materials and Finishes Work Best for Mailing?
Outer envelopes should lean toward a heavier, more durable stock since they’re the piece taking the beating in transit. Inner envelopes can be lighter and more decorative since they never touch a mail sorting machine directly.
Liners, metallic inks, and specialty finishes add visual impact, but they come with tradeoffs worth knowing before you order:
- A patterned or foil liner inside the outer envelope adds noticeable thickness, which can bump your suite into a higher postage tier.
- Metallic or dark-colored outer envelopes sometimes need extra postage verification, since ink coverage can occasionally interfere with automated sorting.
- Gummed outer envelopes seal securely for transit; ungummed inner envelopes stay true to tradition and keep the suite easy for guests to open without tearing anything.
- Always weigh one fully assembled envelope, including liner and enclosures, before buying stamps for the full batch.
Why Choose InvitationBox for Envelopes and Finishing Touches
InvitationBox has spent more than 19 years helping hosts get formal stationery right, backed by educational guides on envelope addressing etiquette and return address placement. The proprietary Snap Stamp system lets you build a custom self-inking stamp for consistent, elegant addressing across every envelope in your suite, no calligrapher required.

Pair your invitations with pieces like the Corner Scrolls Square Stamper, Classic Scroll Square Stamper, Modern Scroll Stamper, Horseshoe Stamper, Jolly Rogerette Stamper, or Extra Ornamental Stamper for return-address stamping that matches your suite’s formality. For save-the-dates or thank-you notes down the line, the Fun Holiday Confetti Photo Card and Believe Photo Card round out a cohesive stationery timeline. Samples, templates, and a support team familiar with quantity and fit questions make ordering less of a guessing game.
The Etiquette Rule Most Hosts Get Backwards
Most engaged couples treat the inner envelope as a formality left over from a bygone era, something to skip if the budget’s tight. That’s backwards. The outer envelope is the part that’s mostly ceremonial today, since the postal service doesn’t care whether it’s addressed to “Mr. and Mrs.” or just a name and street number. The inner envelope is the piece doing actual work: it’s the only place in your entire suite that tells a guest, in plain language, who’s invited.
Skip it if you want, but don’t skip the clarity it provides. If you’re going single-envelope to save money, put that same information somewhere, whether that’s a line on the outer envelope or a small insert card. The mistake isn’t choosing a simpler system. It’s choosing a simpler system and forgetting that its whole job was to prevent confusion.
Where I’d push back on convention: don’t treat “Mr. and Mrs.” as the default just because it’s traditional. Ask your guests what they prefer, especially for unmarried couples, blended families, and anyone who doesn’t fit a template written decades ago. Etiquette should serve clarity and respect, not the other way around.
— Jon
How InvitationBox Makes Envelope Addressing Simple
Getting inner and outer envelopes right shouldn’t require a etiquette course, and it doesn’t have to eat your weekend either. InvitationBox gives you the products to make formal addressing look effortless instead of hand-cramping.
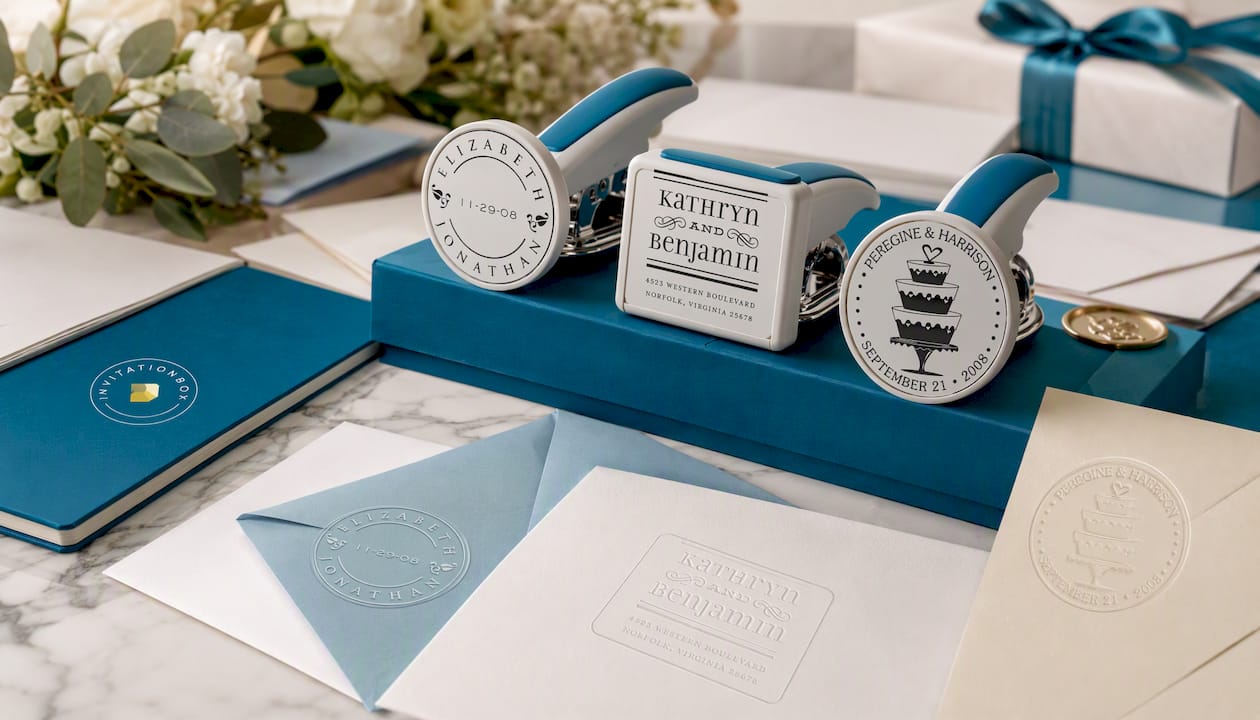
Start with a stamper that matches your invitation’s style. The Classic Scroll Square Stamper or Embosser and Modern Scroll Stamper or Embosser both create crisp, repeatable impressions for return addresses, so every envelope in a stack of 150 looks identical instead of slightly off. If your event calls for something more distinct, the Horseshoe Stamper or Embosser and Extra Ornamental Stamper or Embosser add a decorative signature to your suite without extra printing costs.
Before you commit to a full order, request a sample envelope, measure your invitation card against it, and weigh the assembled suite to confirm postage. Once you’ve confirmed fit, order your stamper and pair it with coordinating note cards or photo cards for thank-yous down the line. If you have questions about quantities or sizing, InvitationBox’s team can walk you through it before you buy.