

Mail Wax Seals for Invitations Safely, Keep Seals Under 1/8 Inch
Yes, you can mail wax-sealed envelopes, and your seal will almost always survive the trip if you follow one rule: keep it thin and flexible. Use mailable wax pressed to about 1/8 inch, or protect a thicker traditional seal inside an outer envelope. Skip that step, and you risk a USPS nonmachinable surcharge or a cracked seal at delivery.
TL;DR:
- Use flexible, thin sealing wax of about 1/8 inch thickness to ensure the seal survives postal handling without risking nonmachinable surcharges.
- Test a single envelope by mailing it to yourself to check for cracks, smears, or postage issues before mass mailing hundreds of invitations or letters.
- Keep the seal centered on the back flap and under 1/8 inch thick, as exceeding that may cause manual processing and additional charges.
- Employ protective packaging like inner and outer envelopes, bubble mailers, or cardboard sandwiches to prevent raised wax seals from triggering nonmachinable markings.
- Prioritize selecting or customizing the wax and stationery materials, and conduct consistent batch testing to avoid the common pitfalls of cracking, smearing, or returned mail.
Table of Contents
- The wax seal mailing checklist to run before you send anything
- Which wax and stationery materials actually survive the mail?
- How thick should a wax seal be, and where do you place it?
- Protective packaging and postage: what changes the price?
- Test one piece before you mail a hundred
- What to do when a seal cracks, smears, or gets returned
- Why 19 years of stationery experience changes how you approach this
- The one thing most wax seal advice gets backwards
- Get your mailing kit sorted in one order
- Where to check the official rules and deeper how-tos
- Sources
The wax seal mailing checklist to run before you send anything
Before you melt a single stick of wax, walk through this list. It takes five minutes and saves you from repeating a hundred-piece batch.
- Pick flexible, mailable wax or a self-adhesive wax sticker instead of brittle traditional wax
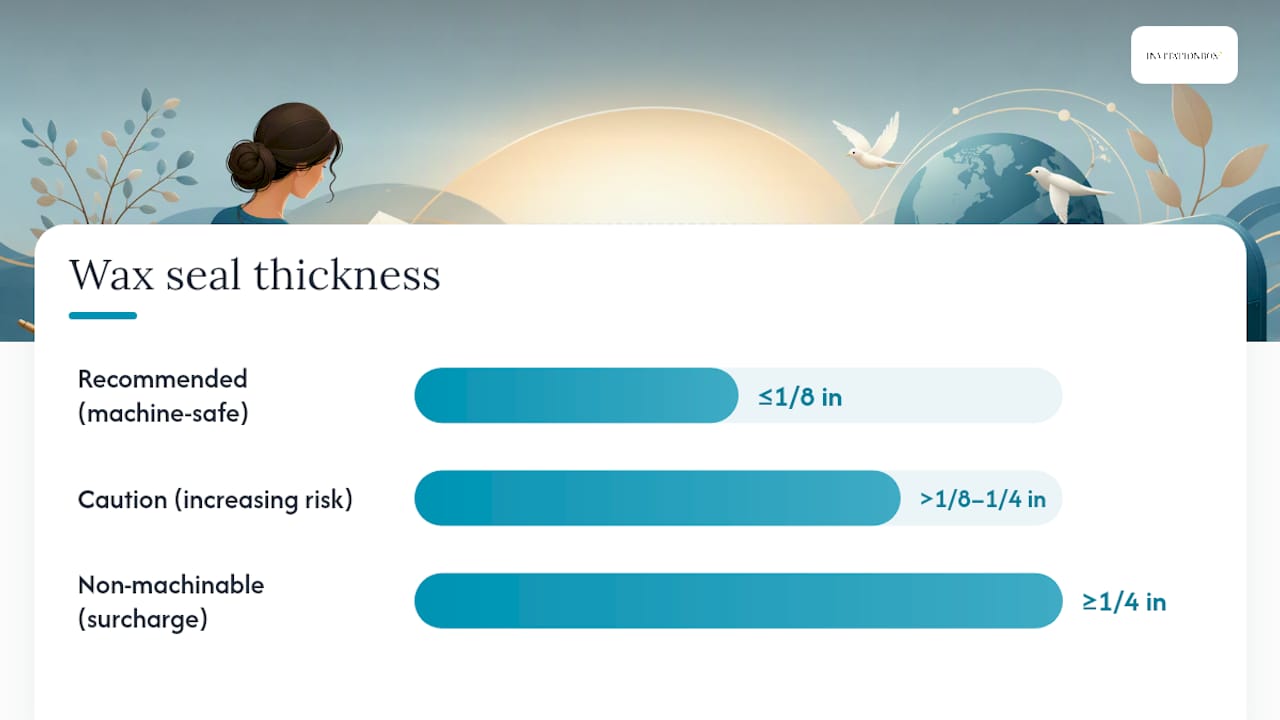
- Place the seal on the back flap, not the front, and press it thin, close to 1/8 inch
- Choose your protection method: inner and outer envelope, a bubble mailer, or a plan to hand-cancel at the counter
- Weigh and inspect one finished envelope, then take it to a postal clerk before committing to the full batch
Pro Tip: Bring your test envelope to the post office counter rather than guessing at home. Clerks can measure thickness and tell you on the spot whether it will be classified as nonmachinable.
Which wax and stationery materials actually survive the mail?
Traditional shellac-based sealing wax looks gorgeous on your desk and shatters the moment a sorting machine flexes the envelope. Flexible sealing wax, blended with rubber or polymer additives, bends instead of cracking, which is why crafters increasingly treat it as the default for anything going through the mail rather than handed to a guest.
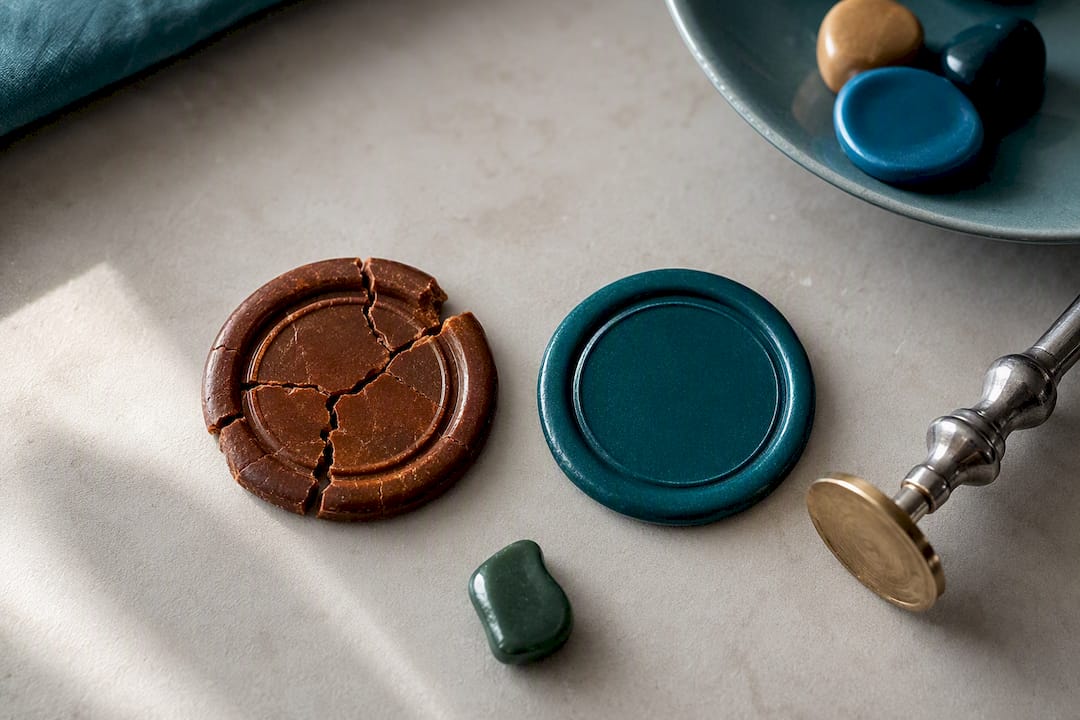
Glue-gun wax sticks are worth considering too. They melt at a consistent temperature, which matters when you’re producing dozens of identical seals in one sitting rather than eyeballing a pour from a candle stick.
Self-adhesive wax seal stickers solve the consistency problem entirely since every seal comes out identical, but they don’t dodge nonmachinable classification if they still create a raised surface on the outside of the envelope.
Your paper matters as much as your wax. Look for:
- Envelope stock rated 80 lb or higher, or a cotton/linen blend that resists buckling under wax
- Standard letter dimensions so you don’t accidentally trigger large-envelope or parcel pricing
- A back flap large enough to fit your stamp design without crowding the edges
How thick should a wax seal be, and where do you place it?
Here’s the number that matters most: keep your seal at or under 1/8 inch thick. Cross 1/4 inch and USPS is very likely to flag it as nonmachinable, adding a surcharge and routing it for manual handling instead of running it through automated sorting.
Pro Tip: Keep a ruler or a small caliper next to your wax stamping station. Checking thickness while the wax is still slightly warm lets you correct a heavy pour before it fully hardens.
Getting a thin, even seal comes down to technique, not luck:
- Melt wax to a consistent pool, whether from a glue gun or a spoon over a candle
- Press the stamp down firmly and evenly, using the same pressure every time if you’re doing a batch
- Hold for a full count of ten to fifteen seconds, letting the wax cool before you lift the stamp
- Let the finished seal cure completely before stacking or bagging envelopes
Placement matters as much as thickness. Center the seal where the back flap meets the body of the envelope, never on the front and never near an edge, where it’s more likely to catch on sorting equipment or a mail carrier’s hand.
Protective packaging and postage: what changes the price?
USPS treats raised or uneven closures as nonmachinable items, and a wax seal is a textbook example of that trigger. Once flagged, your envelope gets pulled for manual processing and hit with an extra surcharge on top of standard postage. That’s not a penalty for creativity. It’s simply what happens when a raised surface can’t run through a machine designed for flat mail.
You have three realistic ways to manage that risk:
- Inner and outer envelope: seal your letter in a decorative inner envelope, then slide it into a plain outer envelope. The outer piece stays flat and machine-friendly while your wax stays protected inside.
- Bubble mailer: the most reliable option for anything thick or delicate, though it usually bumps you into a higher postage tier.
- Cardboard sandwich: two pieces of lightweight cardboard distribute pressure evenly across the envelope, which helps prevent a concentrated crack point right where the wax sits.
If you’d rather not gamble, write “NON-MACHINABLE” near the postage area and hand-cancel the piece at the counter instead of dropping it in a mailbox. A postal clerk can weigh and measure it on the spot, which is the only truly definitive way to know your postage before you commit to a hundred identical envelopes.
Test one piece before you mail a hundred
Every wax seal veteran says the same thing: mail yourself one finished envelope before you touch the rest of the stack. Address it to your own home, drop it with the rest of your outgoing mail, and wait to see what arrives.
- Inspect the returned envelope for cracks, smears, or a torn flap
- Check whether it arrived with a postage-due notice or a machinability flag
- If it failed, adjust one variable at a time: switch to flexible wax, shave down thickness, add an inner envelope, or plan to hand-cancel
- Repeat the test until the piece arrives clean
For larger runs, don’t trust a single prototype for a run of 200 invitations. Test every 25 to 50 pieces, especially if you’re switching wax colors or stamp designs mid-batch, since heat and pressure can drift over a long session. For weddings or corporate mailings in the hundreds, a professional mailable-seal service that standardizes wax, thickness, and packing may cost less in reprints and stress than a DIY run gone wrong.
What to do when a seal cracks, smears, or gets returned
Even careful crafters hit snags. Here’s how to fix the most common ones fast:
- Cracked seals: switch to flexible wax and press it thinner. Brittle wax is almost always the root cause, not bad luck.
- Smearing or sticking: slip a small square of parchment paper over the seal while it cools, or let it cure longer before stacking envelopes. Consider an interior sticker seal instead of an exterior wax pour if smearing keeps happening.
- Returned or postage-due mail: reweigh the piece, add postage to match its actual weight and thickness, or switch to an outer envelope that meets standard letter dimensions instead of triggering an oversize rate.
Why 19 years of stationery experience changes how you approach this
Some stationery providers have over 19 years of experience designing stampers, embossers, and stationery built to survive real-world handling, not just look good on a desk. That experience shapes a few practical recommendations worth following:
- Use a quality self-inking or wax stamper so every impression comes out the same depth and diameter, which is half the battle in keeping thickness consistent across a batch
- Choose envelope stock heavy enough to support wax without buckling, especially for inner and outer envelope setups
- Standardize your stamping station (same wax, same pressure, same cooling time) before you start a run of more than a dozen pieces
Pro Tip: If you’re stamping more than 50 envelopes, set a timer for consistent cooling between pieces. Rushing the cure time is the single most common cause of smeared or misshapen seals in batch work.
The one thing most wax seal advice gets backwards
Most guides treat wax seal mailing as a packaging problem: buy a sturdier envelope, add more padding, hope for the best. That’s backwards. The seal itself is the variable you control most directly, and it’s the one most people fix last instead of first.
Switching from traditional to flexible wax solves more problems than any envelope upgrade ever will, because it removes the actual cause of cracking rather than compensating for it after the fact. A thin, flexible seal in a plain envelope beats a thick, brittle seal wrapped in three layers of protection, and it costs less in postage too.
The other thing conventional advice underplays: testing one piece isn’t optional, and it isn’t overkill. It’s the fastest way to catch a bad wax choice or a heavy-handed stamp before it costs you a hundred reprints. If your budget only stretches to one change, spend it on better wax before you spend it on better packaging.
Prioritize the seal, test before you commit, and everything else on this list becomes a lot less critical.
— Jon
Get your mailing kit sorted in one order
This platform offers a practical alternative to piecing together wax, stamps, and envelopes from three different craft stores. One order gets you a stamper built for consistent impressions, envelopes sturdy enough to protect a wax seal, and cards ready to slide inside once your test piece clears the post office.
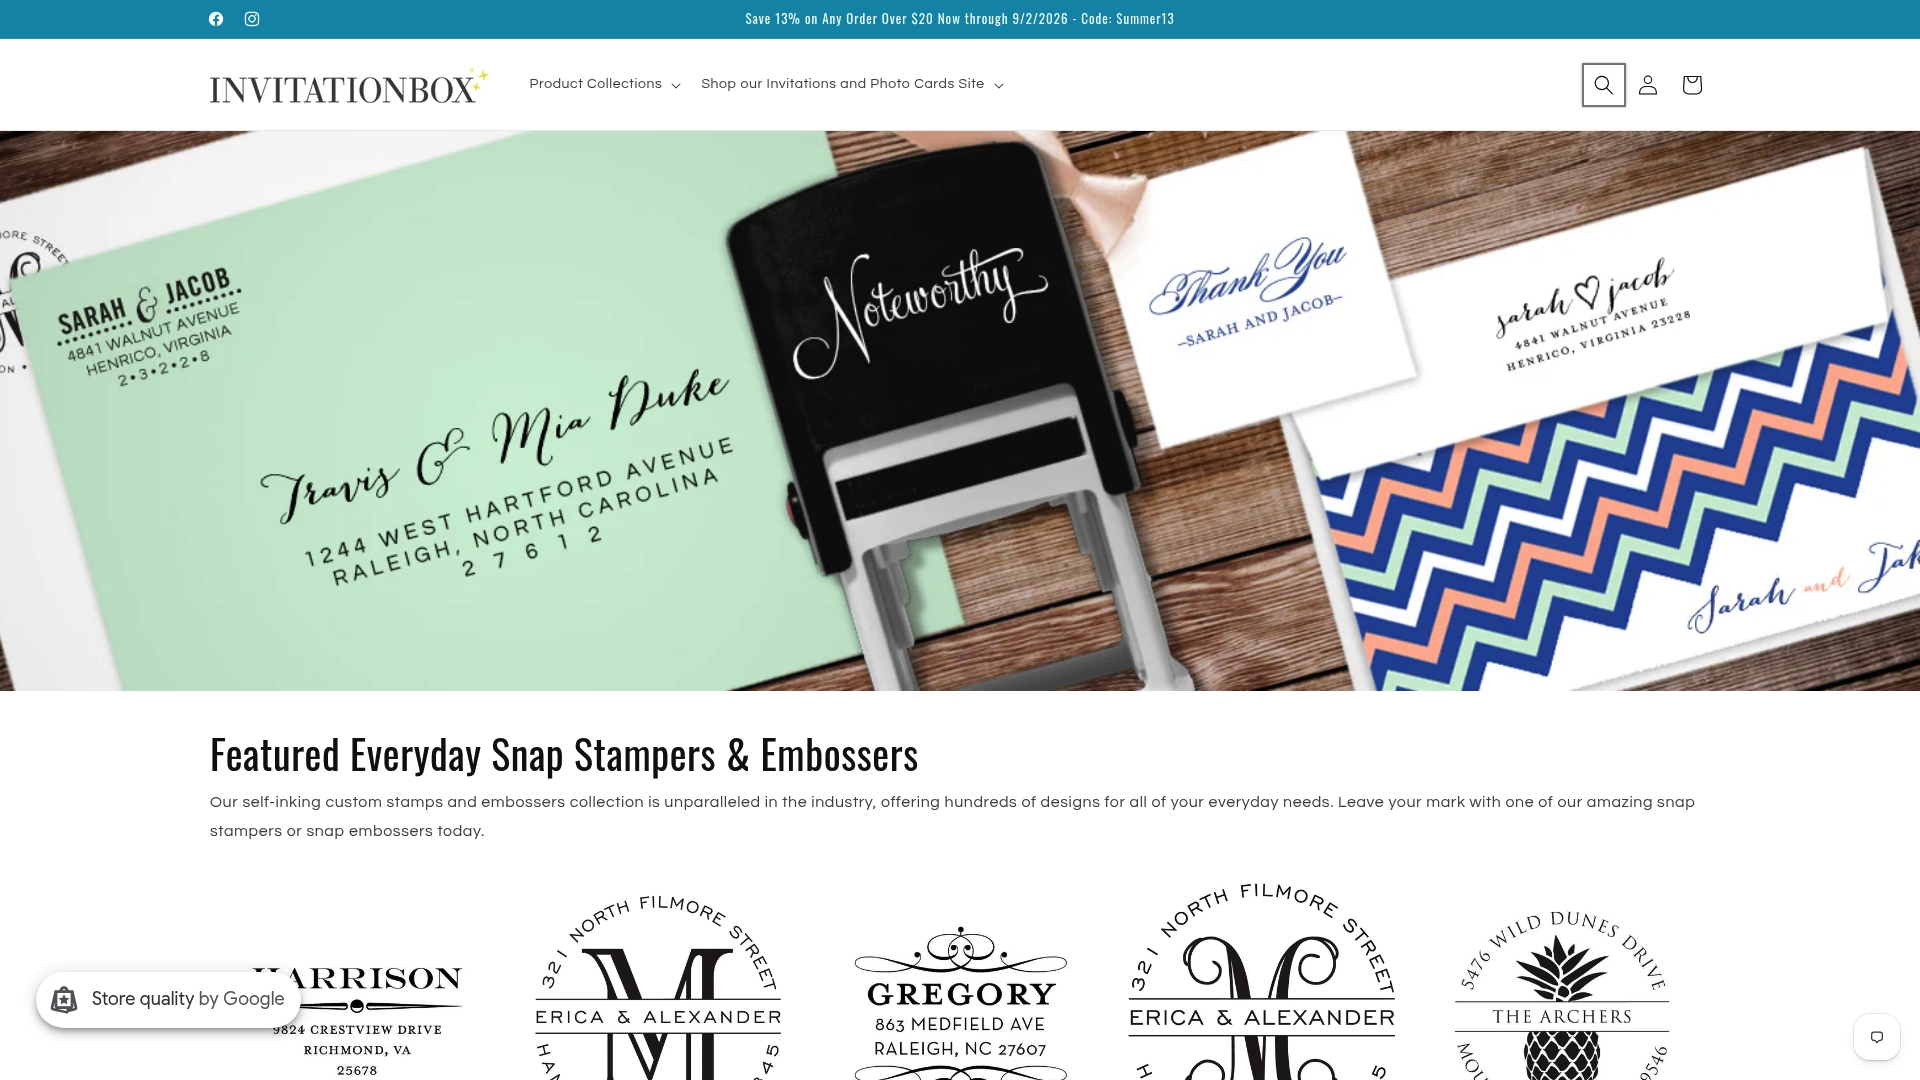
Start with a stamper that gives you repeatable results batch after batch. The Corner Scrolls Square Stamper or Embosser and the Classic Scroll Square Stamper or Embosser both produce a clean, even impression that presses down thin without losing detail, which is exactly what you need to stay under that 1/8 inch target. Prefer something more contemporary? The Modern Scroll Stamper or Embosser works the same way. For playful or seasonal projects, browse the Horseshoe, Jolly Rogerette, or Extra Ornamental designs, and pair your sealed envelopes with a matching set like the Fun Holiday Confetti Photo Card or Believe Photo Card.
Order a stamper and ten envelopes, mail one test piece to yourself, and confirm your setup before you commit to the full batch.
Where to check the official rules and deeper how-tos
For the technical side of nonmachinable mail, go straight to the source, and pair it with hands-on guides written for wax seal crafters specifically.
- USPS DMM: mailpiece design and nonmachinable guidance
- How to Send Wax Sealed Letters Through the Mail
- Mailable wax seals: what makes them different
Sources
- USPS DMM — Mailpiece Design & Nonmachinable guidance
- Does a wax seal affect postage cost and delivery? — LegalClarity
- How to Send Wax Sealed Letters Through the Mail | Wax Letter
- Flexible sealing wax — product page (Colonial Williamsburg shop)